CMake presets
Introduction
CMake presets are a collection of configuration, build and test options for a CMake project. These options are described in two JSON files named CMakePreset.json and CMakeUserPresets.json respectively. They both live in the project’s root directory and have exactly the same schema. The difference between them is that the former is meant to specify project-wide build details, while the latter is meant for developers own local build details.
Therefore, the common options that shared with others are written in the CMakePreset.json and can be commited into version control. The specific options are defined by each developers in CMakeUserPresets.json, and for this reason, it’s important not to add CMakeUserPresets.json into version control.
This enables developers to share build knowledge both with others and with build instances such as continuous integration (CI).
CMake Preset Sections
The CMake presets files are JSON documents with an object as the root and describe the following sections:
Configuration: The data that’s normally passed on the command line to the CMake executable. Examples of this include options, environment variables, toolchain information, and generator information (Visual Studio/Xcode projects).
Build: A list of targets to build, along with other minor build options describing how to drive the compiler.
Test: Instructions on how to execute CTest. Information such as which tests to run, how to output the results, and what to do when a failure occurs.
CMake Presets Inheritance
A preset can inherit from another preset that is defined in the same file or in the files it includes with unlimited levels. The preset will inherit all of the fields from the inherits presets by default (except name description, and displayName), but can override them as desired.
If CMakePresets.json and CMakeUserPresets.json are both present in the same directory, CMakeUserPresets.json implicitly includes CMakePresets.json. Then presets in CMakePresets.json may be inherited by presets in CMakeUserPresets.json.
Better Integration with IDEs
With CMake presets, all the dependencies and recipes are held in a parsable JSON format, meaning that tools can read them, too. Besides passing CMake presets to CMake CLI directly, many IDEs start to integrate CMake presets in their tools. Microsoft start CMake presets support in Visual Studio 2019 and VS Code CMake plugin. JetBrains team also brings this feature to [CLion].(https://www.jetbrains.com/help/clion/cmake-presets.html).
Every developer can choose what text editors, IDEs, and tools they want to use to perform their job. That means we have many people working on/with different platforms, , etc.
All this means less setup for the developer, less chance of human error and making sure we’re all developing with reproducible results. The final directory structure will becomes:
1 | --| |
Using CMake Presets in Visual Studio Code
In this secion, i will show you using Visual Studio Code and it extension to configurate and build a simple CMake project with CMake presets.
Prerequisites
To complete the tutorial in the following section, install the following:
- Visual Studio Code.
- C++ extension for VS Code.
- CMake Tools extension for VS Code.
- CMake 3.20 above.
- Visual Studio build tool.
Enable CMake Preset option
First of all, you need to enablbe CMake preset option in CMake Tools settings section. Change the value to always to use CMake preset file explicitly.
| Setting | Description | Accepted values |
|---|---|---|
| cmake.useCMakePresets | Use CMakePresets.json to drive CMake configure, build, and test | always, never, auto |
Prepare CMake Porject
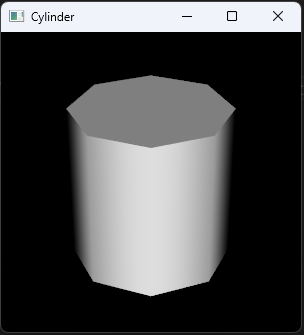
Add a source code file: Create a new file and name the file helloWorld.cpp. Here i display a cylinder in VTK interactive render window.
1
2
3
4
5
6
7
8
9
10
11
12
13
14
15
16
17
18
19
20
21
22
23
24
25
26
27
28
29
30
31
32
33
34
35
36
37
38
39
40
int main(int, char *[]) {
vtkNew<vtkCylinderSource> cylinder;
cylinder->SetResolution(8);
vtkNew<vtkPolyDataMapper> cylinderMapper;
cylinderMapper->SetInputConnection(cylinder->GetOutputPort());
vtkNew<vtkActor> cylinderActor;
cylinderActor->SetMapper(cylinderMapper);
cylinderActor->RotateX(30.0);
cylinderActor->RotateY(-45.0);
vtkNew<vtkRenderer> renderer;
renderer->AddActor(cylinderActor);
renderer->ResetCamera();
renderer->GetActiveCamera()->Zoom(1.5);
vtkNew<vtkRenderWindow> renderWindow;
renderWindow->SetSize(300, 300);
renderWindow->AddRenderer(renderer);
renderWindow->SetWindowName("Cylinder");
vtkNew<vtkRenderWindowInteractor> renderWindowInteractor;
renderWindowInteractor->SetRenderWindow(renderWindow);
renderWindow->Render();
renderWindowInteractor->Start();
return EXIT_SUCCESS;
}Add CMakeLists.txt: Create a CMakeLists.txt file in root directory with the following content.
1
2
3
4
5
6
7
8
9
10
11
12
13
14
15
16
17
18
19
20
21
22
23
24
25
26
27
28
29
30
31
32
33
34
35
cmake_minimum_required(VERSION 3.20.0)
project(helloWorld LANGUAGES CXX)
find_package(VTK COMPONENTS
vtkCommonColor
vtkCommonCore
vtkFiltersSources
vtkInteractionStyle
vtkRenderingContextOpenGL2
vtkRenderingCore
vtkRenderingFreeType
vtkRenderingGL2PSOpenGL2
vtkRenderingOpenGL2
QUIET
)
set(CMAKE_CXX_STANDARD 17)
set(CMAKE_RUNTIME_OUTPUT_DIRECTORY ${PROJECT_BINARY_DIR}/bin)
set(CMAKE_LIBRARY_OUTPUT_DIRECTORY ${PROJECT_BINARY_DIR}/lib )
add_executable(${PROJECT_NAME}
helloWorld.cpp
)
target_link_libraries(${PROJECT_NAME}
PRIVATE
${VTK_LIBRARIES}
)
vtk_module_autoinit(
TARGETS ${PROJECT_NAME}
MODULES ${VTK_LIBRARIES}
)
Now, the directory structure looks like:
1 | --| |
Configure And Build
Create Presets
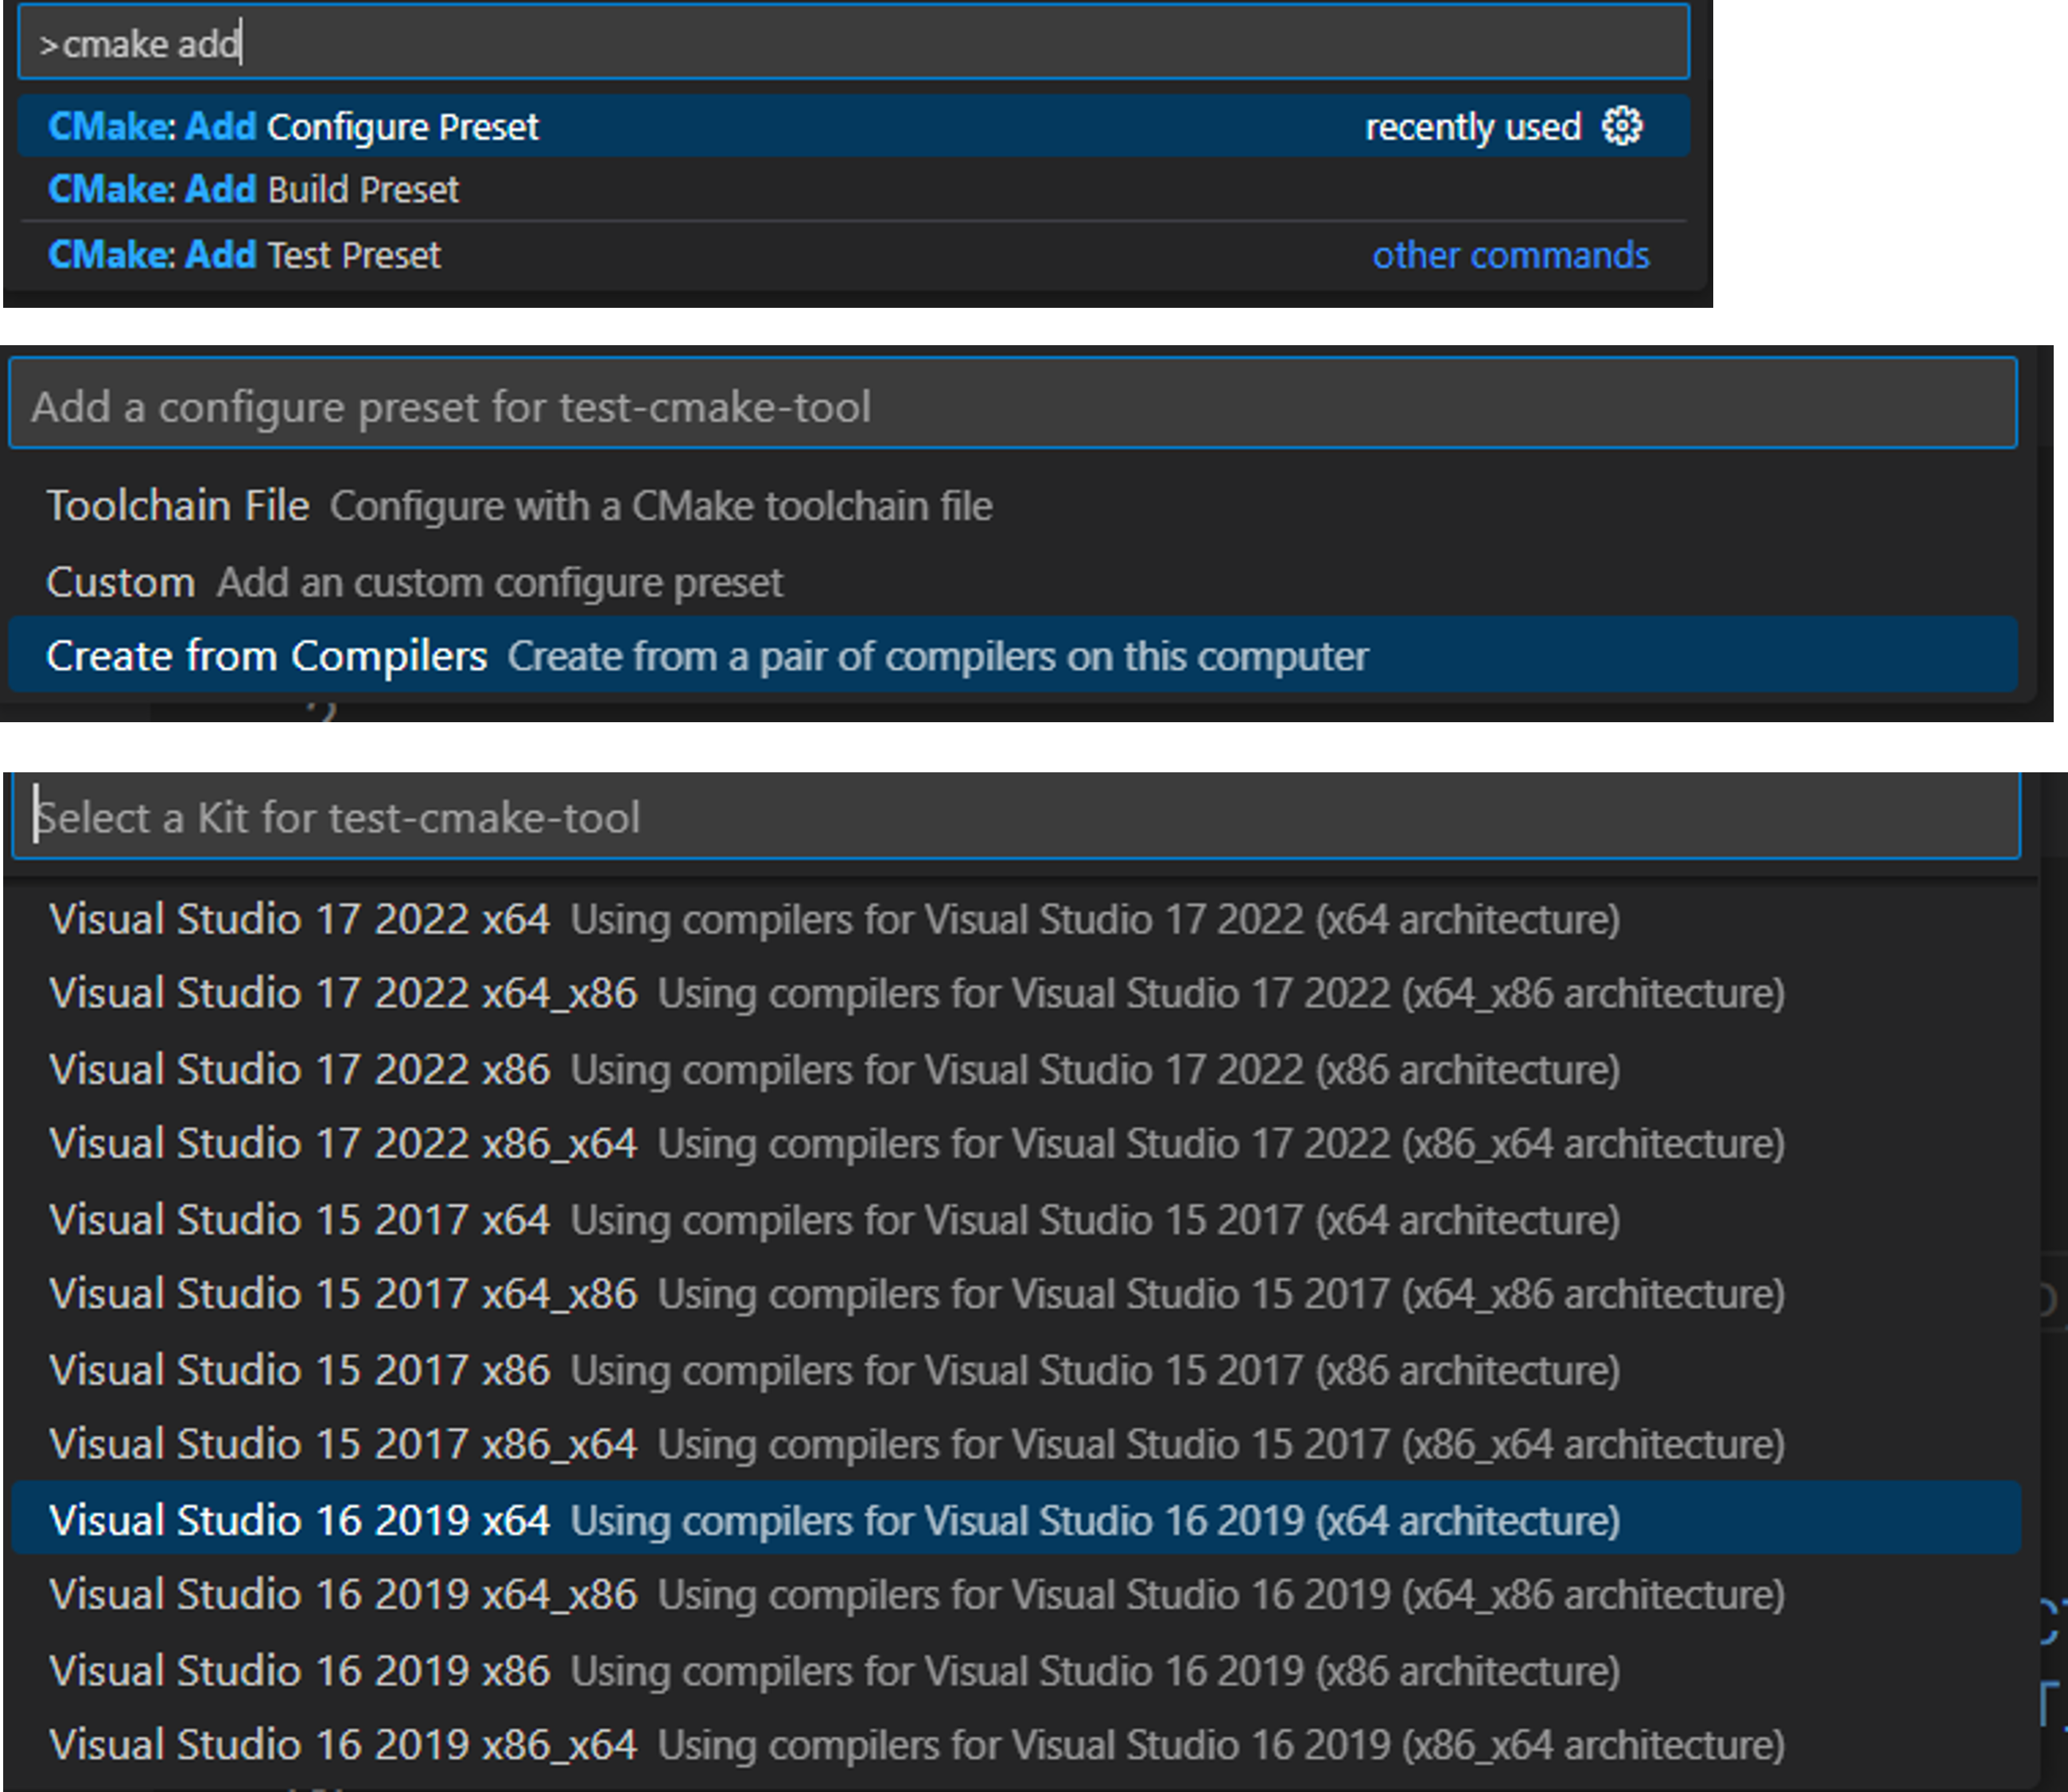
Run CMake: Add Configure Preset from the command palette and choose Create from compilers. With Visual Studio build tool installed on your computer, CMake Tools lists the available kits for preset. Select one of the kit from the list to create CMakePresets.json in the root directory. In this article i choose Visual Studio 2019 x64 for the preset, both configure preset and build preset are generate in the CMakePresets.json.
Now, you have a CMakePresets.json similar to the json data below. Remember to add VTK_DIR in section cacheVariable, so VTK library can be found. If you want to output the binary files in specific place, modify the value in key binaryDir.
1 | { |
The directory structure after this ste is:
1 | --| |
Configure CMake Project
Run CMake: Select Configure Preset and select one of the configure presets defined in the CMakePresets.json and CMakeUserPresets.json. To configure the project, run CMake: Configure to configure the project with the active configure preset. This is the same as running cmake –preset
Build CMake Project
Run CMake: Select Build Preset and select one of the build presets defined in the CMakePresets.json and CMakeUserPresets.json. To build the project, run CMake: Build to build the project with the active budil preset. This is the same as running cmake –build –preset
Run And Debug
After the project are built, the developer would like to test and debug the progarm. Visual Studio Code supports the debugging function with the following debuggers for C/C++:
- Linux: GDB
- macOS: LLDB or GDB
- Windows: the Visual Studio Windows Debugger or GDB (using Cygwin or MinGW)
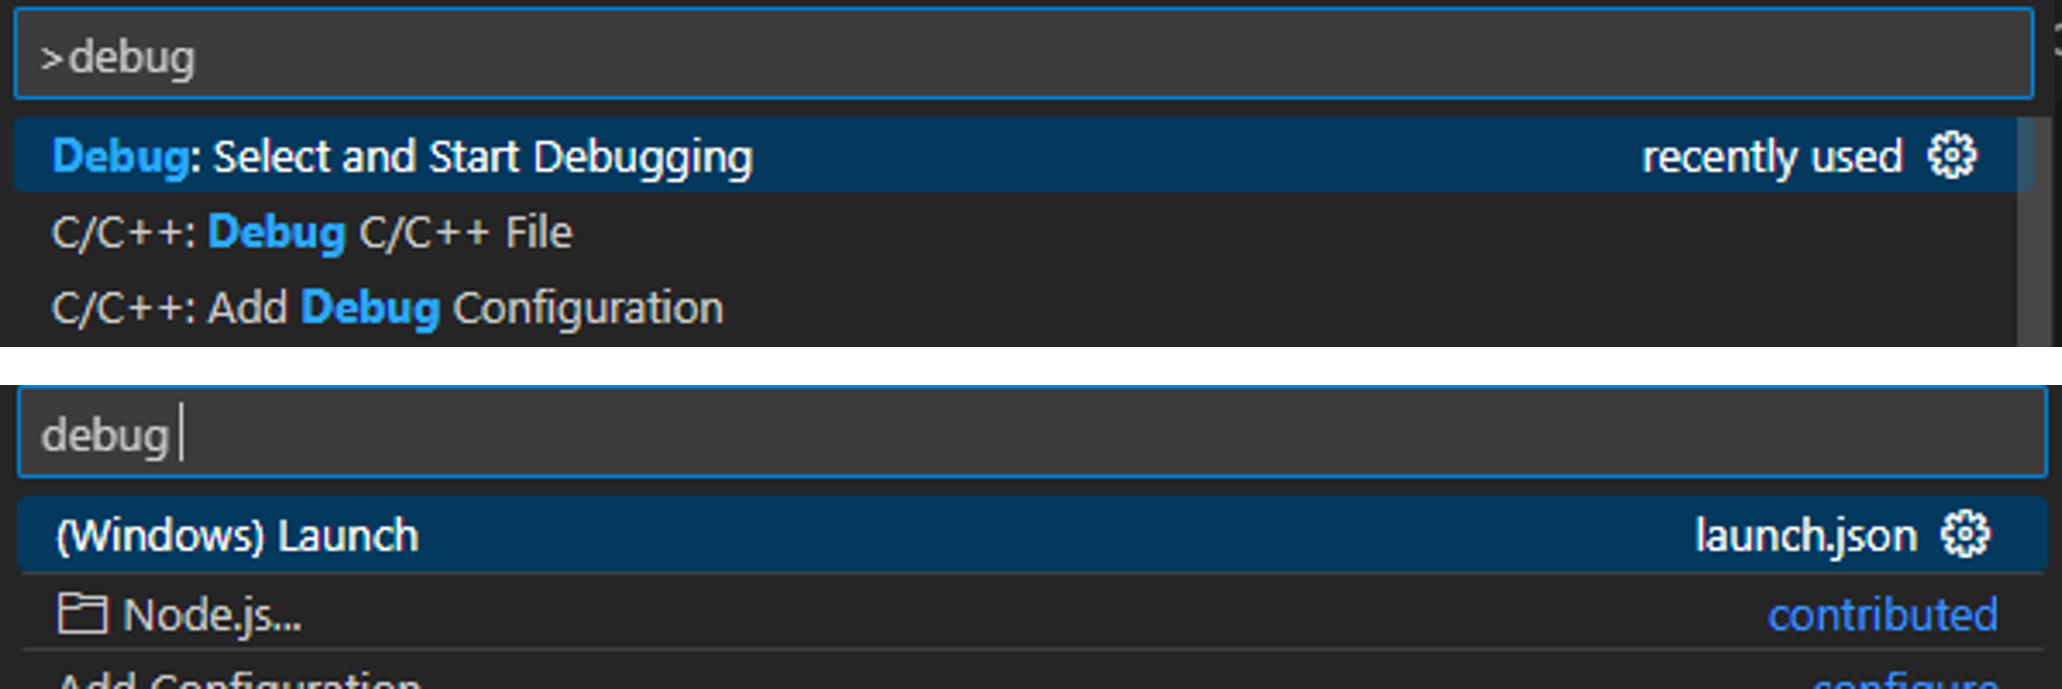
The launch.json file in .vscode folder is used to set up the basics of your debugger and debugging environment. To add a debug configuration, run C/C++: Add Debug Configuration and select your prefer configuration. In this article, i choose,(Windows) Launch, the default configuration for Windows as our debug configuration. Then change the three places in the launch.json file:
- program: The executable or file to run when launching the debugger. Set it to
"${command:cmake.launchTargetPath}". - program: The working directory for finding dependencies and other files. Set it to
"${command:cmake.launchTargetDirectory}". - environment: The environment variables settings. Add the path of directory contains VTK dlls, so the program can load the library when debugging.
Below is an example of debug configuration using in this article:
1 | { |
For more information about Visual Studio Code debugging, please visit link.
Choose the debug configuration and start the program. Our hello world program is executed under the enviroment defined above.
Conclusion
I hope you now understand how to use CMake presets in in Visual Studio Code. CMake Preset ensure that multiple configurations remain consistent among the developers and reduce number of mistakes that may occur. CMake Tools extension provide many convient method to work with CMake Preset in Visual Studio Code. Using them properly can increase can reduce simplicity for everyone working on the project!
Many topics can’t be covered in this article, such as CMake Presets Inheritance, CMakeUserPresets.json and debugger extensions. These topic can be found in the reference list.
Reference
https://cmake.org/cmake/help/latest/manual/cmake-presets.7.html
https://code.visualstudio.com/docs/cpp/cmake-linux
https://github.com/microsoft/vscode-cmake-tools
https://vector-of-bool.github.io/docs/vscode-cmake-tools/index.html
https://www.kdab.com/the-power-of-cmake-presets/
https://www.nanoframework.net/build-updated-to-cmake-presets/
https://pspdfkit.com/blog/2021/cmake-presets-in-practice/
https://code.visualstudio.com/docs/editor/debugging#_debugger-extensions